Kubernetes
Karpenter
Learning Guide
Karpenter: Optimizing Kubernetes for Efficiency and Cost-Effectiveness

Introduction
Karpenter is an open-source, flexible, and high-performance Kubernetes cluster autoscaler designed to optimize cost and efficiency for workloads. Unlike traditional autoscalers, Karpenter dynamically provisions just the right compute resources at the right time, enabling developers and DevOps teams to focus more on their applications and less on infrastructure management. This blog will delve into the benefits of Karpenter, how it works, and how you can get started using it.
Karpenter Official Website: https://karpenter.sh
Benefits of Using Karpenter
-
Dynamic and Fast Scaling
Karpenter responds quickly to changing workload demands by provisioning and de-provisioning nodes in seconds. This agility helps to handle sudden spikes in traffic or workloads more effectively than traditional autoscalers, which rely on static rules and tend to be slower.
-
Cost Optimization
Karpenter's flexible provisioning model allows it to select the most cost-efficient instances based on the workload requirements. It supports spot instances, on-demand instances, and reserved instances, automatically choosing the most economical option available.
-
Better Resource Utilization
Karpenter optimizes resource utilization by automatically selecting instances that match the specific CPU, memory, GPU, and networking requirements of your workloads. This helps to avoid the over-provisioning and under-utilization problems that are common in many Kubernetes environments.
-
Customizable Scaling Policies
Karpenter supports customizable scaling policies, allowing you to define rules based on workload requirements, scaling events, and specific node configurations. This flexibility ensures that applications receive the right amount of resources at the right time.
-
Enhanced Cluster Efficiency
By taking advantage of multiple Availability Zones and instance types, Karpenter distributes workloads in a way that minimizes latency and optimizes the use of AWS infrastructure. It automatically handles draining and terminating nodes with minimal impact on running applications.
How Karpenter Works
Karpenter works by monitoring the state of the Kubernetes cluster and making real-time decisions about scaling operations.
Example NodePool YAML:
apiVersion: karpenter.sh/v1beta1
kind: NodePool
metadata:
  name: example-pool1 # Name of the NodePool
spec:
  template:
    metadata:
      labels: # Add custom labels here
        custom-label-key: custom-label-value
    spec:
      requirements:
        - key: kubernetes.io/arch
          operator: In
          values: ["amd64"] # Architecture of the node
        - key: kubernetes.io/os
          operator: In
          values: ["linux"] # Operating System of the node
        - key: karpenter.sh/capacity-type
          operator: In
          values: ["spot"] # Capacity Type of the node
        - key: karpenter.k8s.aws/instance-category
          operator: In
          values: ["t"] # Instance Category of the node
      nodeClassRef:
        apiVersion: karpenter.k8s.aws/v1beta1
        kind: EC2NodeClass
        name: default
  limits:
    cpu: 1000 # Maximum number of CPUs
    memory: 1024 # Maximum amount of memory
  disruption:
    consolidationPolicy: WhenUnderutilized
    expireAfter: 720h
  tags:
    custom-tag1: value1
    custom-tag2: value2
Here’s a breakdown of how Karpenter functions:
-
Observing the Cluster
Karpenter continuously monitors the Kubernetes API server to understand the state of the cluster. It gathers data about unscheduled pods, existing nodes, and current resource usage. When it detects that there are unschedulable pods or underutilized resources, it triggers the scaling process.
-
Decision-Making Process
When scaling is needed, Karpenter evaluates the best instance types and sizes that can accommodate the unschedulable pods based on factors like price, performance, capacity, and zonal availability. It uses AWS Instance Types to create a cost-effective mix of instance options.
-
Provisioning Nodes
Once Karpenter determines the best instance types, it dynamically provisions new nodes using the Provisioner CRD (Custom Resource Definition). The newly created nodes are ready to take on the unscheduled pods, thereby reducing wait times and enhancing application performance.
-
Node Optimization and De-Provisioning
Karpenter continuously monitors node utilization and optimizes the cluster by de-provisioning underutilized nodes. It drains nodes safely, ensuring that workloads are shifted smoothly without disrupting services. The scaling down process reduces costs and maintains efficient use of resources.
-
Using Taints and Tolerations for Better Control
Karpenter allows users to define taints and tolerations on nodes, giving more granular control over workload placement and ensuring that critical applications get the required resources without interference from less critical workloads.
Getting Started with Karpenter
Official Documentation: https://karpenter.sh/docs/getting-started/
Using Karpenter with Gravity Cloud
Gravity Cloud offers a fully managed Karpenter service that helps you get started with Karpenter in just a few clicks. Follow the steps below to get started:
-
Make sure you have connected your AWS account to Gravity Cloud: https://docs.gravitycloud.ai/quickstart-aws
-
Goto https://console.gravitycloud.ai/kubernetes and click on
Cluster Namein the table that you want to add Karpenter to
This step will add Karpenter labels to the VPC, Subnets and Security Groups for the cluster and creating all the required IAM Roles for Karpenter.
- Goto on
Scalingtab in the drawer and clickEnable Karpenter.
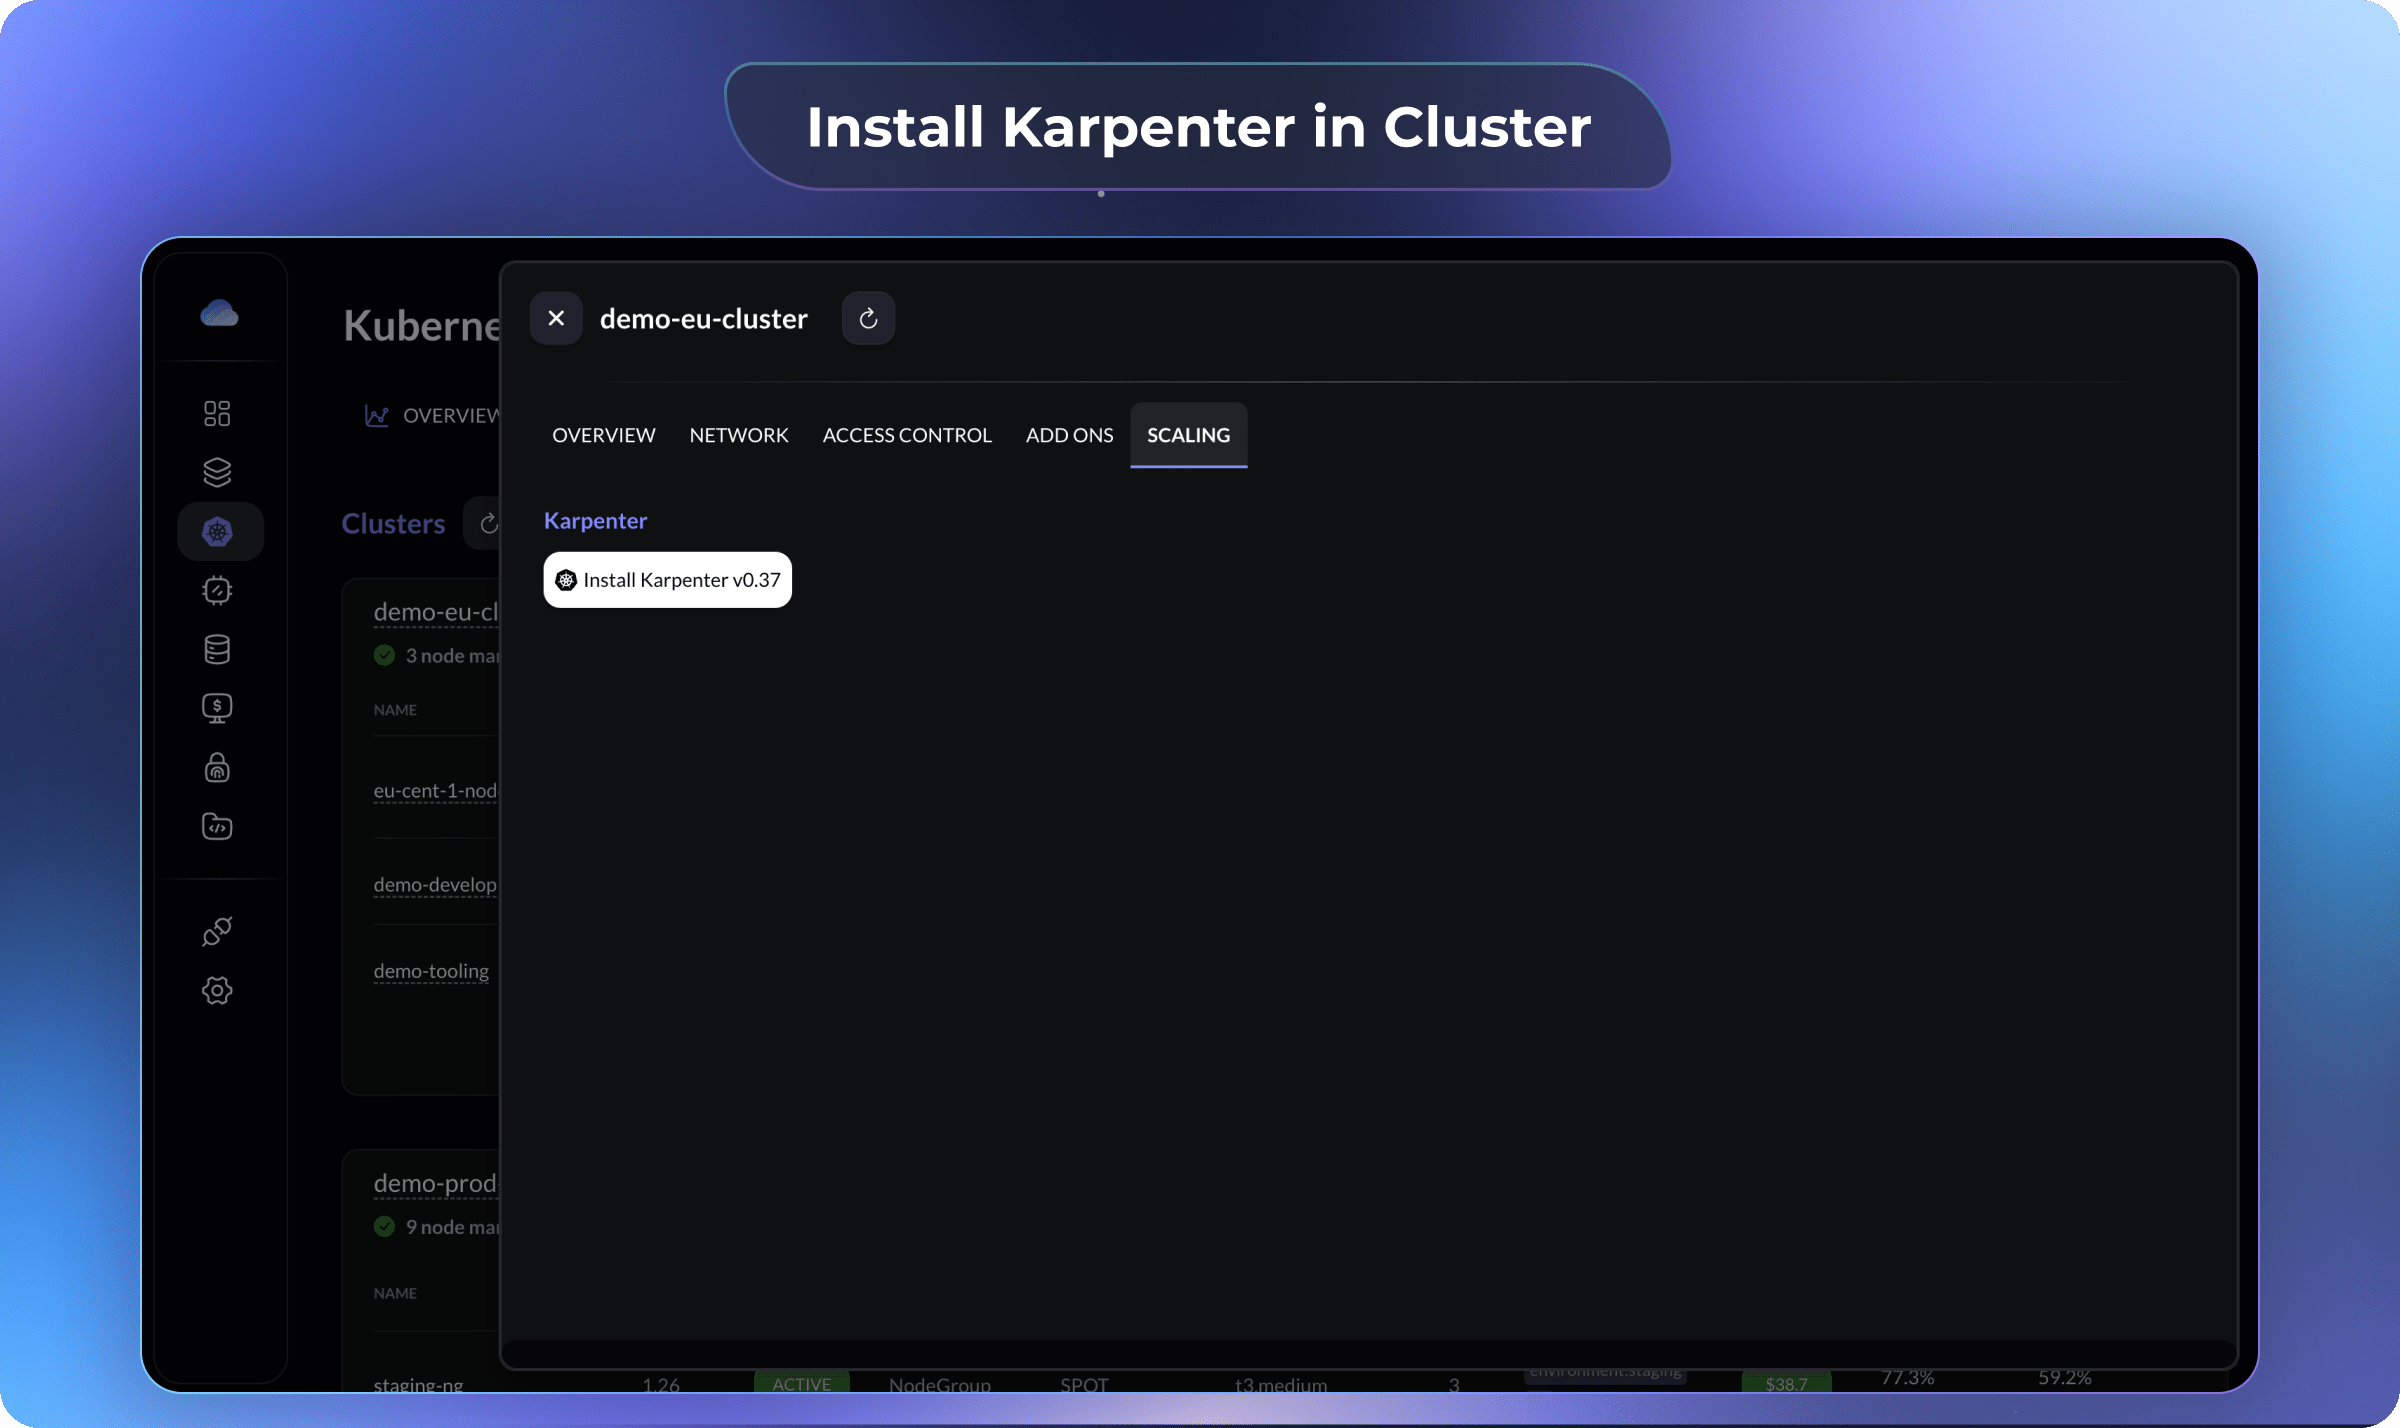
-
Gravity will enable Karpenter for you in a few minutes and notify you once it's ready.
-
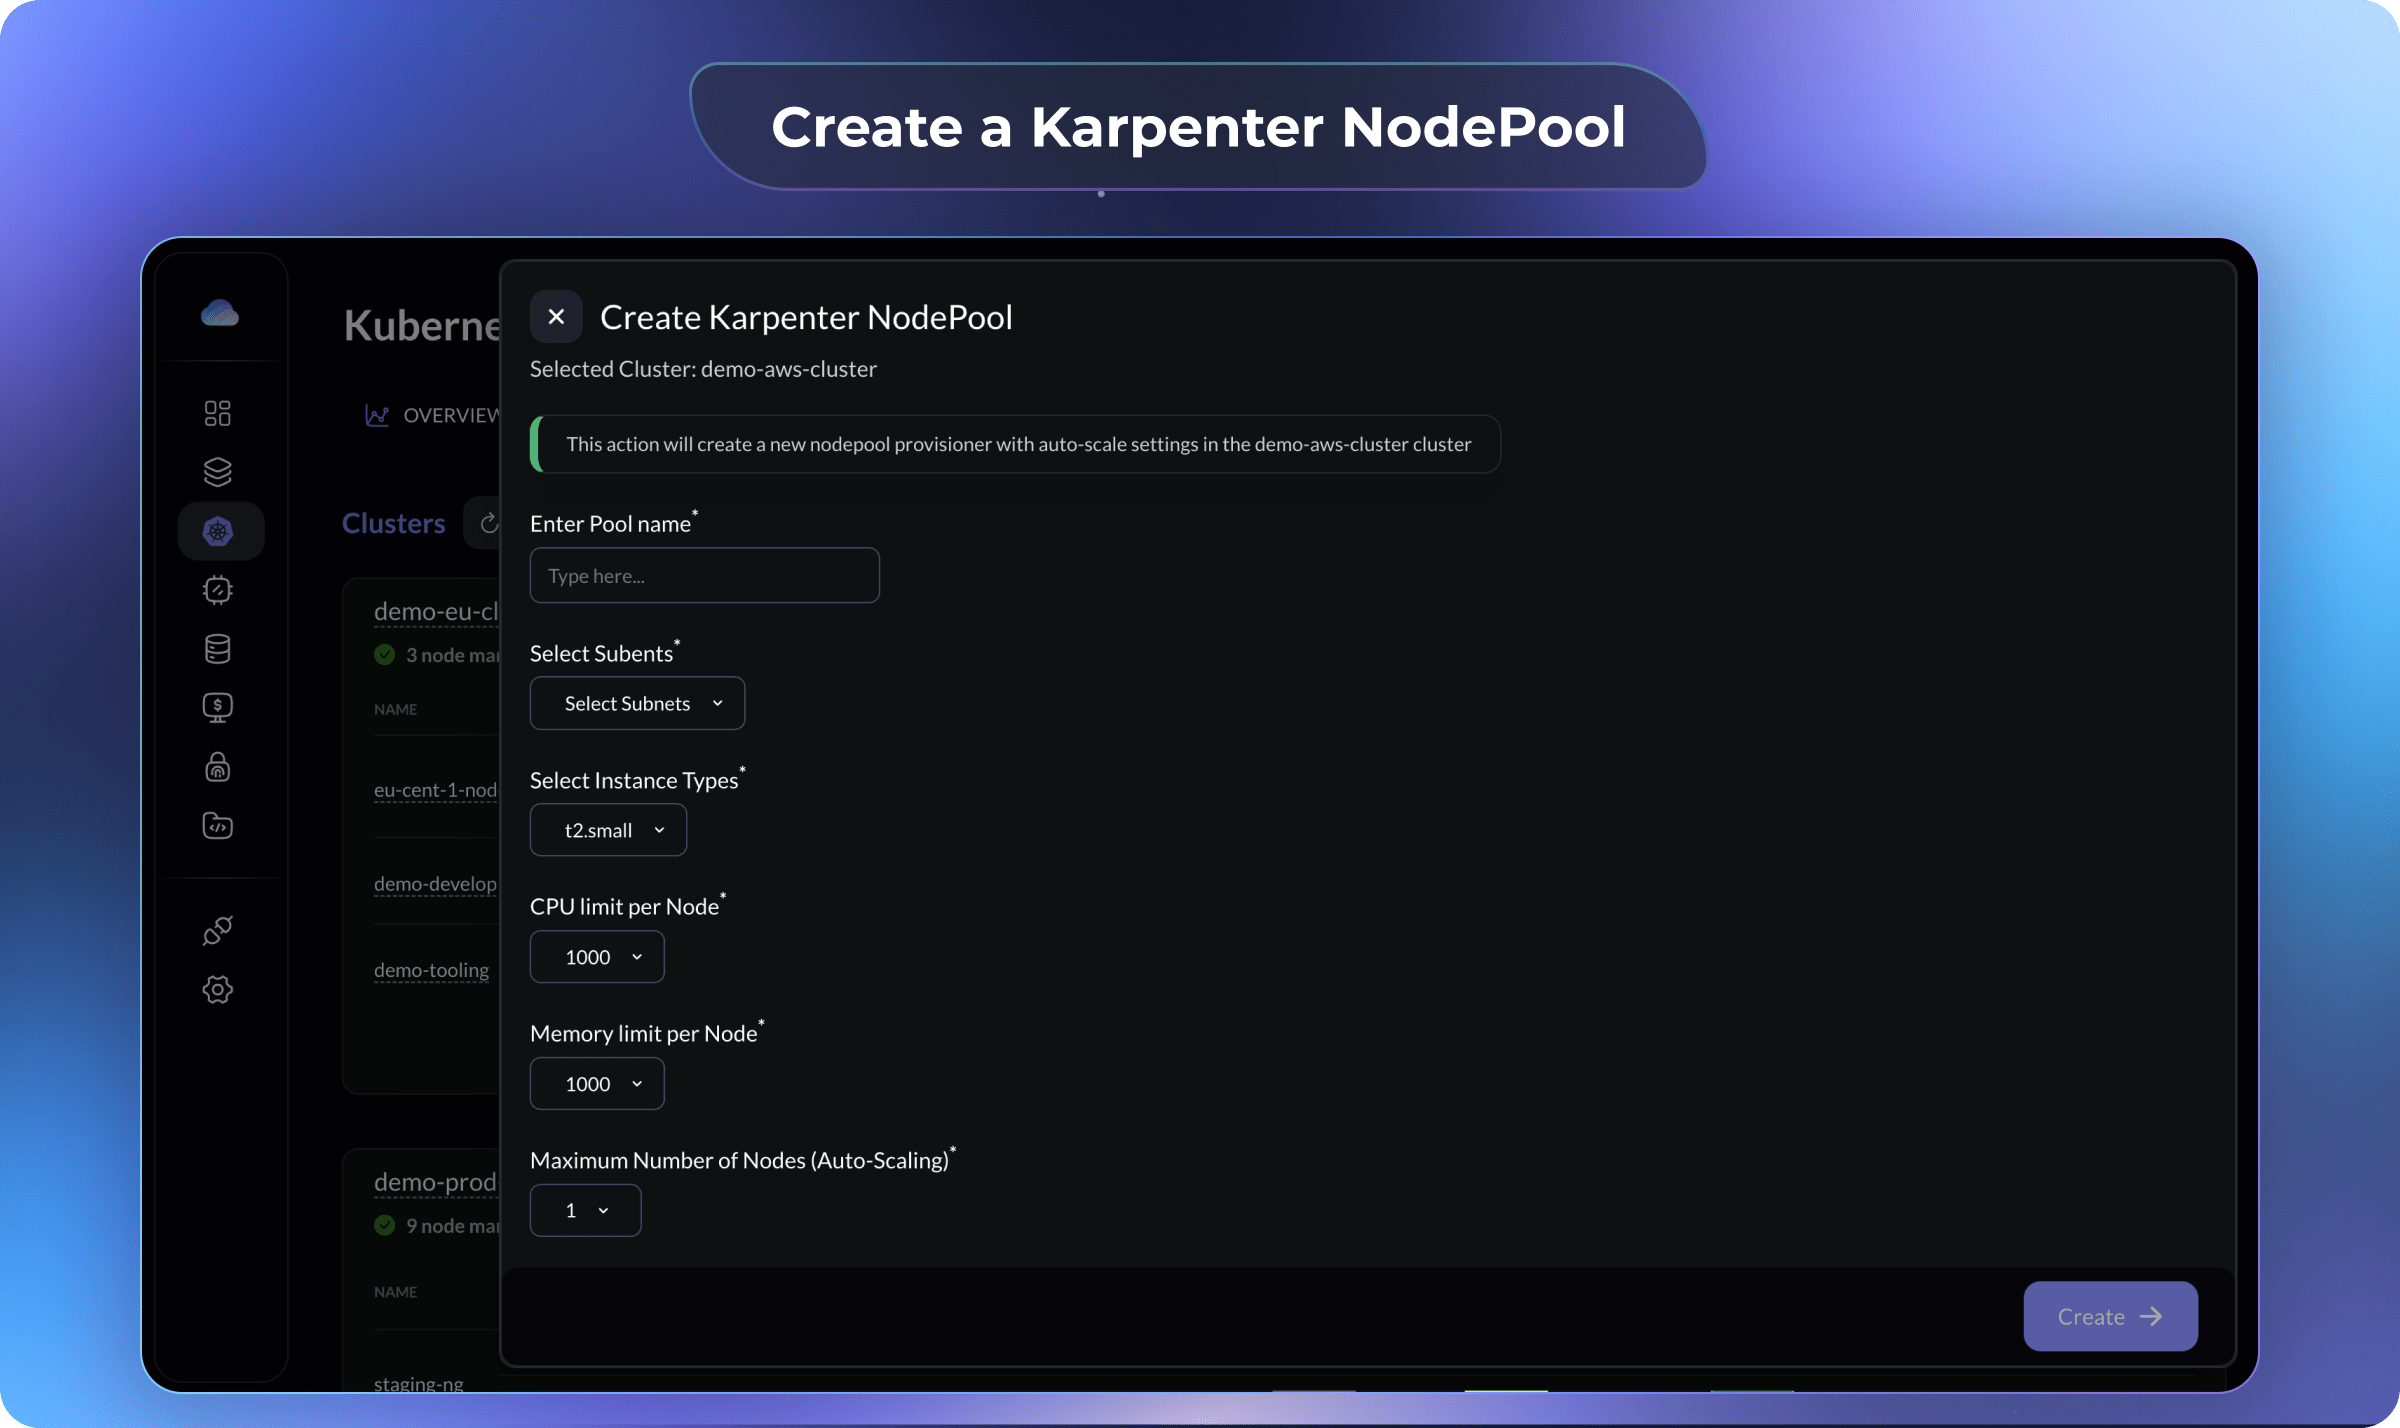
Click on the
Create a NodePoolbutton and create a NodePool with your desired configuration.
This step will create and apply a NodePool YAML file with the selected configuration along with a NodeClass YAML file.
-
Update your deployment YAML file to use the new NodePool using the
nodeSelectorandtolerationsfields. -
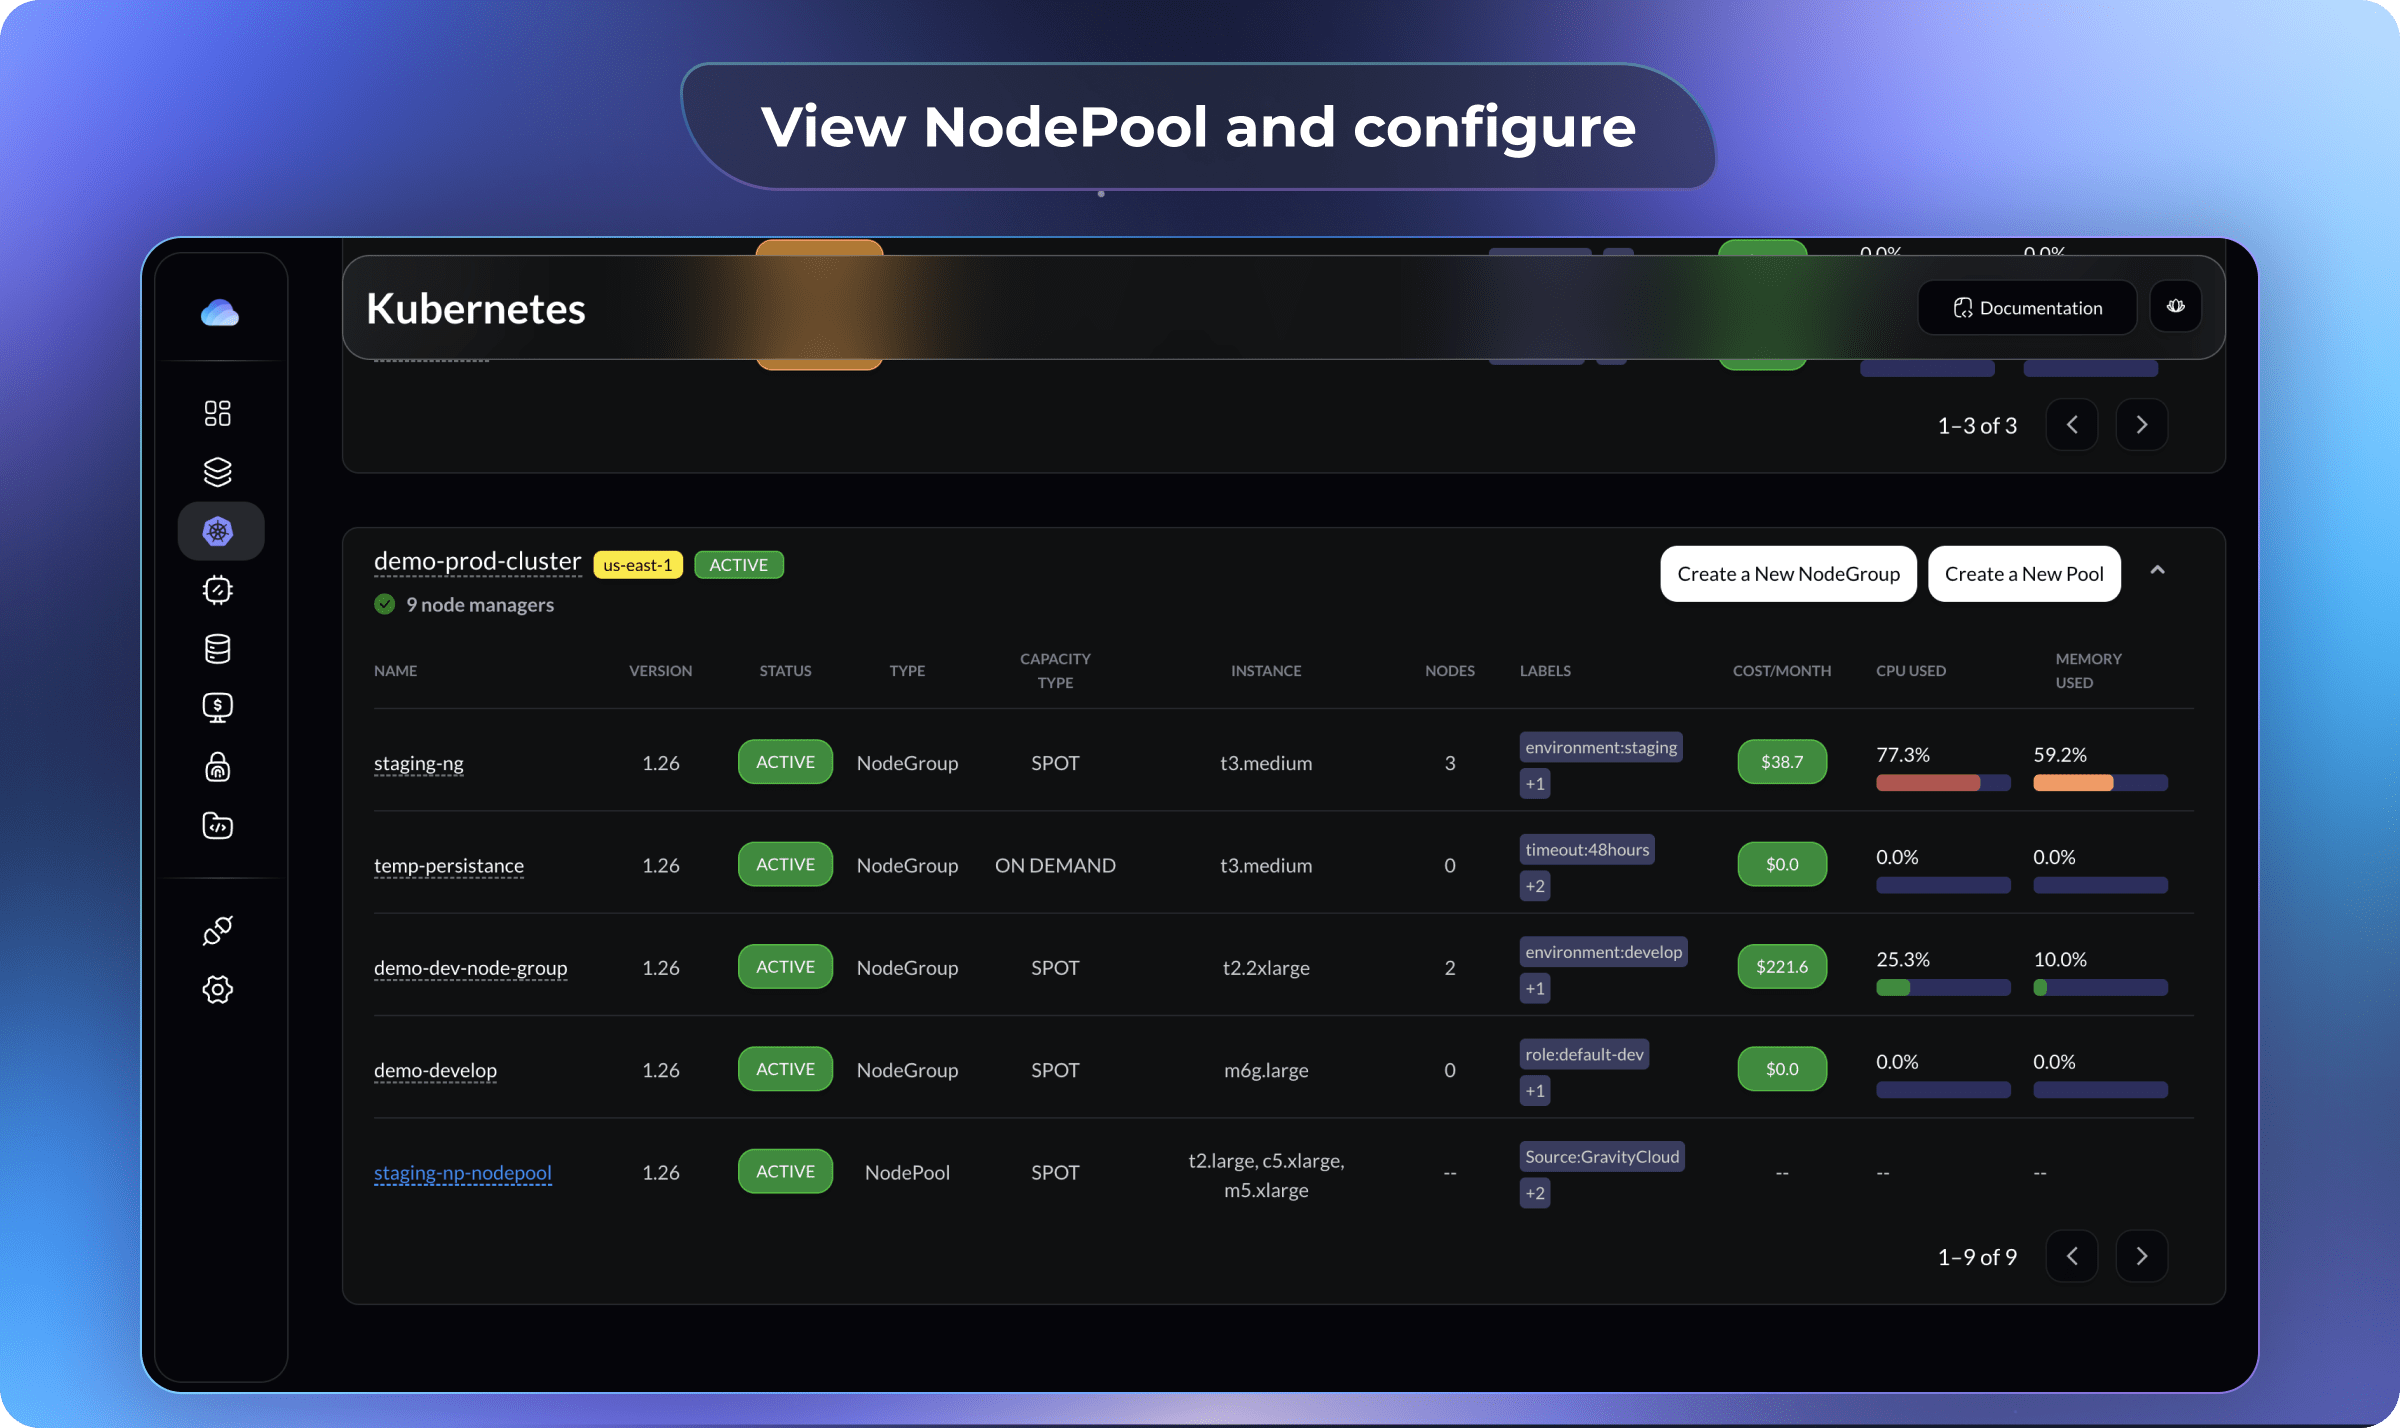
In a few minutes, you will see the nodepool and nodes getting created in your cluster.
If you like this, follow us on Twitter and LinkedIn and explore our platform to help save you more cloud costs - gravitycloud.ai

Share this Article: